Wednesday, 25 April 2012

Felted Dryer Ball Tutorial- the natural alternative

Felted Dryer Ball Tutorial


I have been meaning to do a tutorial on how to make these great dryer balls for months.  Why are felted dryer balls so great??? Where do I begin!?

Dryer sheets are actually bad for your dryer; some dryer warranty's are void if you use dryer sheets.  They are also full of terrible chemicals that are bad for you and certainly not safe for babies/ small children.  I excitedly bought dryer sheets when I first moved out (Mom said they were bad for us and wouldn't let us use them when I lived at home.)  And, I broke out with a TERRIBLE full body rash that took almost 5 months to go away with prescription cortisone creams, etc.  I also had to re-wash everything in my home several times to get the chemicals out.  (Turns out Mom actually knew what she was talking about, go figure!)

Those plastic dryer balls don't cut it in my opinion.  They bang around and are loud.  They aren't very heavy and I can't imagine the move the laundry around that much more.  They crack after a few months, don't reduce static, and don't smell nice.

Felted dryer balls are the bee's knees ;) They are heavier than the plastic ones so they help bang laundry around for good circulation and keep laundry soft.  But, they are soft wool, so they aren't loud in your dryer and never crack.  Plus, they actually heat up and steam hot air.  I find they dramatically reduce the drying time required (saving you $$$) and reduce static.  You can easily scent them with your favorite essential oils for natural and safe scent on your laundry.  Plus, they are completely safe on even babies clothes and ideal for cloth diapers.  The ones in the pic above are well loved; about a year old but still work great! Velcro will stick to these and make them a little fuzzy.  You could trim the fuzziness if you were worried; I'm not, they just go in the dryer :)

Want some!!!??? They are EASY to make!  

Here's how: 

First of all, you need to find wool appropriate for felting.  Look for wool that says "roving" or even says "for felting."  It needs to be 100% wool or very close to it.   The wool strand needs to be lose; not tightly wound to felt properly.  The BEST thing is buffalo wool if you can find it; I found bags and bags of it at a thrift store for a few bucks :) You need quite a bit of wool, so get whatever is cheapest or on sale. :)

To keep the cost down, you can "fill" the center of the ball with a piece of crumpled up fleece.  Then tightly wrap the wool around the fleece in all directions to create a ball of wool. (or just make a tightly wound ball of wool.)  You can also use up bits of leftover roving wool.  I make my dryer balls about the size of a baseball.  To finish off the ball, use the end of a small crochet hook or knitting needle to "stab" the end of the wool deep into the ball to prevent it from unraveling.
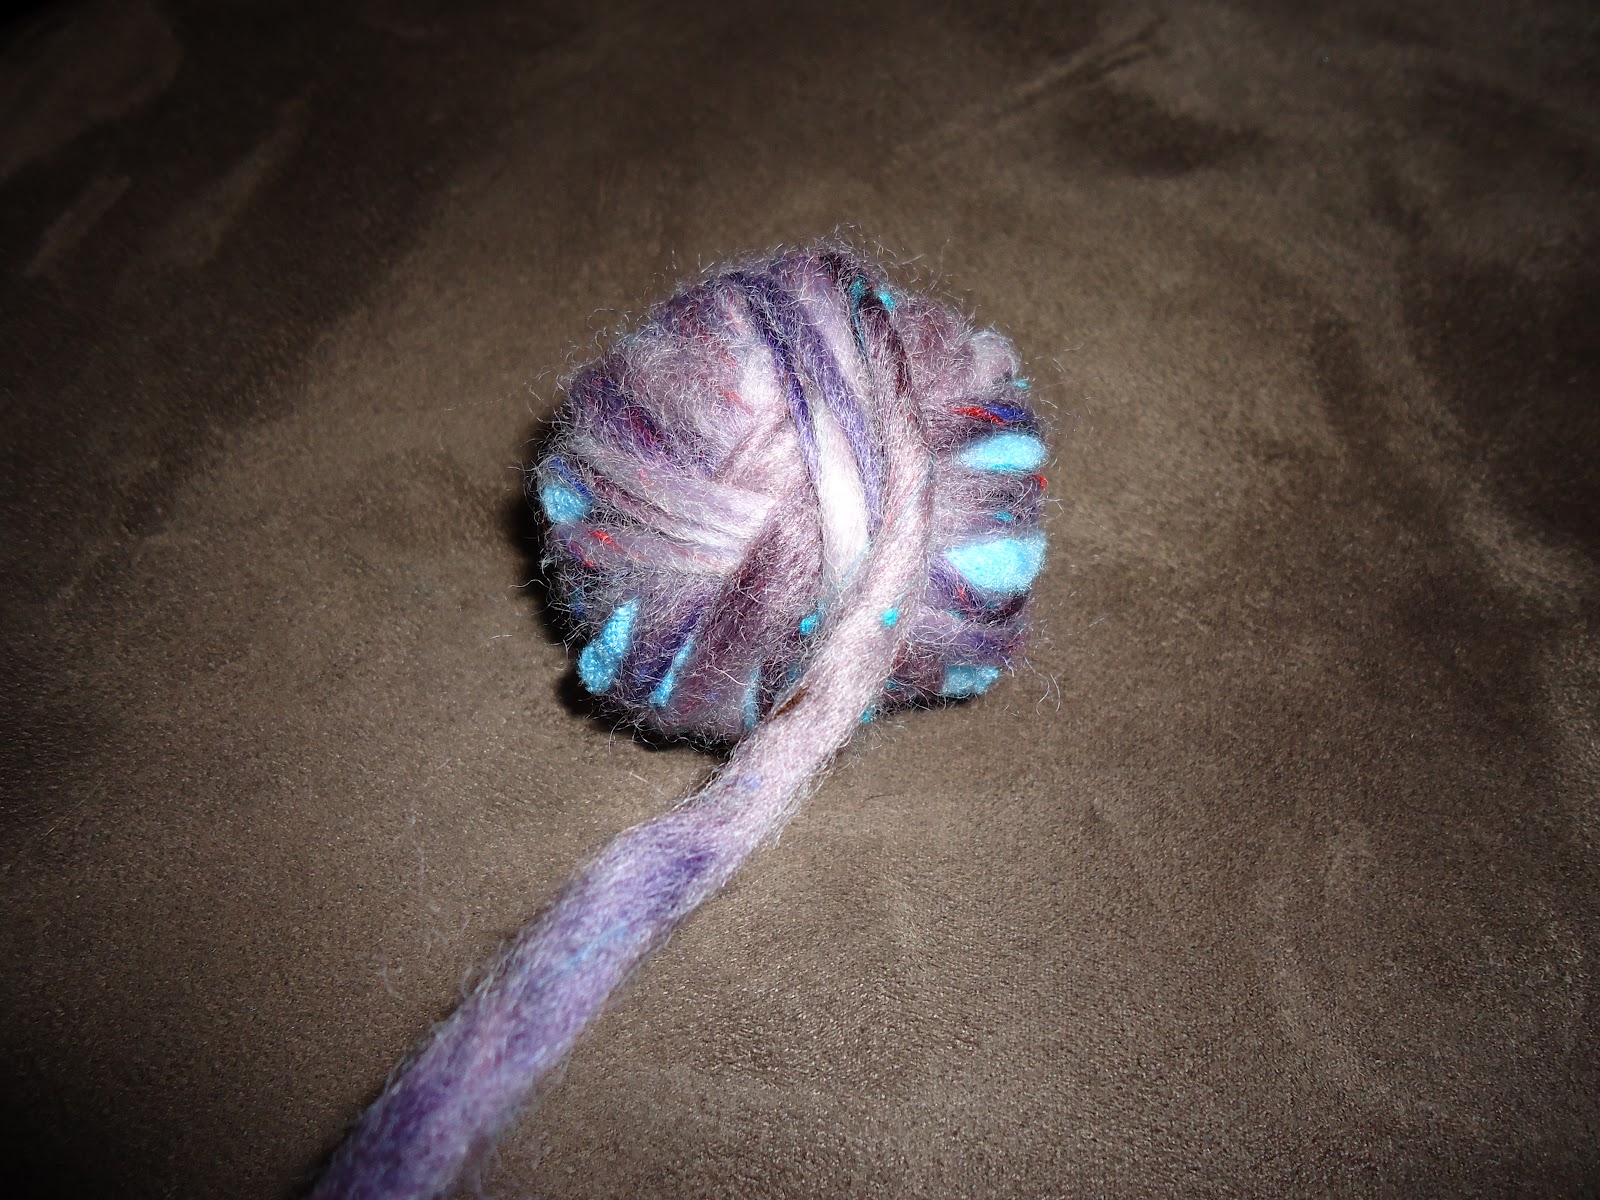


Then, tightly tie the balls individually in an old pair of nylons.  (it has to be tight or it won't work.) Then you wash them in the washing machine with HOT HOT wash (and a bit of laundry soap,) COLD rinse.  (I even run the hot water in the near by bathroom to get the hot water upstairs before turning the washing machine on to make sure it's HOT.)  Dry, then repeat the washing drying directions a second time.

If you are washing the dryer balls with other laundry, be careful as the dryer balls may run color at first if you used bright wool. They won't transfer color in use after being washed twice.  They may smell like a wet sheep at first but don't worry! Washing them twice reduces the smell.  Once they are dry, and only used in the dryer, they won't smell sheep-ish.

After washing and drying twice, you can cut open the nylons and peel out the dryer balls.  They might be really stuck in the nylons, but that's "OK."  It just means they felted well.  Scent each ball with a few drops of your favorite essential oil if desired and you're ready to go! They may need a drop of two of oil every 4-5 loads to keep the scent up.  I love lavender and vanilla oils.  I get mine at Sage. 

ENJOY! These make a great gift for a baby shower or a new mom :)

Wednesday, 11 April 2012

Mango Blueberry Quinoa Salad with Lemon Basil Dressing Recipe


Adapted from the Veggie Belly blog.   http://www.veggiebelly.com/ This was so good! A nice change to my usual quinoa salad and a great way to celebrate the sunny weekend we had.  Even a so called "quinoa hater" loved it.  Quinoa is high in protein so this make a great meal on it's own, or as a side to something delicious on the BBQ on a fantastic sunny day.  I hope you like this as much as my dinner guests and I did. The picture doesn't do this salad justice (it is soooo pretty,) but we were hungry and couldn't find the good camera, so we just used the cell phone and dug in!


Mango Blueberry Quinoa Salad with Lemon Basil Dressing Recipe

For the quinoa
1 cup quinoa
2 cups chicken or vegetable stock

For the fruits and veggies
1 cup fresh blueberries
1 cup cubed ripe mangoes
1 cup cubed cucumbers
1/2 cup dried cranberries

For the lemon basil dressing
1 tablespoons extra virgin olive oil
2 tablespoons lemon juice
1 teaspoon honey
1/4 teaspoon lemon zest
20 Basil leaves, chopped finely
1/4 cup chopped cilantro
Salt and pepper to taste

Place the quinoa and chicken stock in a medium skillet and bring to a boil. Then reduce heat, and simmer covered for about 15 minutes or till the quinoa is cooked. Remove the lid, and fluff the quinoa with a fork. Let it cool to room temperature. (Or I find the easiest way to cook quinoa is in my rice cooker.)

While the quinoa is cooking, combine the fruits in a bowl and refrigerate till you are ready to serve the salad.

Whisk together all the dressing ingredients, except the chopped basil and cilantro. Refrigerate till you are ready to serve. Chop and add the basil and cilantro to the dressing just before serving. If you add it earlier, it will go black.  I found that this salad did not require any added salt, but this will depend on how salty your stock is. 

Add half the dressing to the quinoa and mix gently.

Assemble the salad just before serving – toss the quinoa, fruits and cucumbers together. Serve other half of the dressing on the side. Serve  immediately.

This served 4 for dinner and I found the leftovers kept and made a great lunch for two the next day. 

Monday, 2 April 2012

Lemon Blossoms- these are good. That's all i'm going to say!

These taste like little lemon donuts... but better. My "foodie" girlfriend made them and sent hubby and I home with some extra's; we fought over them :) Apparently they are best if you make them the night before.

http://www.foodnetwork.com/recipes/paula-deen/lemon-blossoms-recipe/index.html

Addendum: I found the food network recipe left out a few important instructions.  Do not fill the muffin cups more than half way or they will spill over the top while they bake and look weird.  To make them uniform, use a scoop so the same amount of batter goes in each muffin cup.  ***let the lemon blossoms cool for at least 5 minutes before removing from pan.  If you "bang them out, right out of the oven as suggested, they will get all mashed and deformed (trust me.)  You might need to loosen them with a knife to get them out easily.  I hope that helps!!!


The BEST "Stolen" Chocolate Cake


So, rumor has it this recipe was originally from a Master Pastry Chef that served this popular cake at a very high end Vancouver hotel restaurant. I have no idea how my co-worker came across the recipe, but after we tried it at a pot-luck lunch at work, we ALL demanded the "secret" recipe!!! This is the most delicious, light and moist chocolate cake that is not too sweet! The recipe is also easy and very reliable. Give it a try! It is great with ice cream and fresh berries, or on it's own with a cup of coffee :)

Stolen Chocolate Cake
2 cups brown sugar
1 1/4 cups flour
3/4 cup cocoa
2 tsp baking soda
1 tsp baking powder
1/2 tsp salt
2 eggs
1 cup buttermilk
1 cup black coffee
1/2 cup oil
2 tsp vanilla

Preheat oven to 350 degrees. Combine the first six ingredients in a large bowl. Mix the remaining wet ingredients in a separate bowl. Add the wet ingredients to the dry and mix only until completely moist. The batter will be quite runny; don't worry! Pour into a well greased bundt pan and bake for 35-40 minutes (or until toothpick comes out clean.) Let cool at least 10 minutes before removing from the pan and let cool on a wire rack. Dust with icing sugar before serving.

*I've also made these into cupcakes; put 1/4 cup of batter into a well greased muffin cup and bake about 20 minutes until toothpick comes out clean in the middle.

Saturday, 4 February 2012

Lasagna Rolls OR Mini Italian Spinach Pies- two weeknight dinners, one recipe


I have been making these really good Mini Italian Spinach Pies for a few years and love them. However, a few weeks ago I felt compelled to make a "cheater lasagna" for a quick weeknight meal and decided to use the same filling. They were great! Not gourmet but a quick, happy, healthy weeknight meal. Both of these probably looked better out of the pans and on a plate, but I was lazy and hungry. So, these are the pictures your get ;) I made both options the same night and then didn't have to cook the 2nd night. Yaaa!

Filling:

one 16 oz container of low fat cottage cheese (the tall one)
One package of frozen chopped spinach, thawed, with all the water squeezed out
1 cup part skim mozzarella cheese
4 eggs, lightly beaten
1 small jar (about 7 oz) of roasted red peppers, drained and chopped (could use chopped fresh if it's all you have)
1/3 cup grated Parmesan cheese
1 tsp each dried oregano and basil leaves ( or chopped fresh if you have it)
few shakes of franks red hot
salt and pepper to taste

* mix all ingredient together until well blended. Preheat over to 350 degrees.

Now, we have a few options. You can bake the above mixture in greased muffin cups as is. I like to put some cooked whole wheat spaghetti in the bottom of each cup like a crust, or you can line the cups with cooked torn up pieces of lasagna noodles for a pretty effect. Bake for 20-25 minutes until the middles are set. Allow to cool a few minutes before removing.


OR

Roll up the filling into cooked lasagna noodles (or cheat and get the soft fresh noodles.) Open a jar, yes a jar (it's a weeknight) of your favorite pasts sauce and spread enough to cover the bottom of a greased casserole dish. Nestle your rolls close together in the pan, and top with the rest of your sauce. Top with a little more grated Parmesan cheese. Bake at 350 degrees for 30 minutes. Allow to cool and set for a few minutes before serving.

Sunday, 29 January 2012

Braised Red Cabbage- so delicious!


I went to Brown's Social House with a girlfriend and ordered the "Low Carb Spa Bowl" which is sooo yummy AND they claim it's 450 calories. The whole meal was delicious but I fell in love with the cabbage! It's sweet, tangy with a bit of spice. And, they top it with creamy goat cheese! YUM! I HAD to know how to make it. I spent half the dinner trying to figure out what was in it. I couldn't find any knock off recipes on the internet. So, I played around and after a few try's, I got it! (or something similar.)

I hope you try this! Hubby was again completely prepared to HATE this (especially because I served it with marinated and grilled tofu and a green salad.) But, much to his surprise, he loved it! "I'll give you this one" he said as he gobbled it up! :)

Braised Red Cabbage


Pre-heat oven to 350 degrees.

Half and core one red cabbage. Thinly slice the cabbage; making long thin strips. Pile the sliced cabbage in a large casserole or roasting pan. (Don't worry, it cooks down a lot! So, just pile it in the pan.)


Make dressing:
1/2 cup balsamic
1/4 cup water
2 1/2 tbsp sugar
1/4 tsp each cinnamon and nutmeg
few grinds of salt and pepper

Pour the dressing over the cabbage and roast in the oven for 2 hours, stirring every 20 minutes or so. (or the top will get all dry) If all the liquid evaporates from the bottom of the pan and more cooking time is required, add a little more water. To serve, top with crumbled goat cheese or feta.

I'm sure you could make this in the slow cooker, but i haven't tried it yet. This serves at least 6 people. I like the leftovers :) It reheats well. So, you can easily make ahead if that's more convenient.

I promise! It's so yummy, you won't know it's healthy! And, it's a great option for sides if you are trying to watch your calories/carbs!


And, in case you were interested in the tofu I mentioned earlier, here it is:
Marinade extra firm tofu (cut into slabs) in shallow dish for one hour or overnight.
Marinade: 3/4 cup soy sauce, 1/4 cup orange juice, a little hot sauce if desired. Brush grill and tofu with veggie oil. grill on high heat a few minutes each side until they have nice grill marks. :) This marinade is good with chicken too. Serve with fresh greens in an Asian dressing to complete the "Spa Bowl" idea.

Wednesday, 4 January 2012

Bacon Wrapped Dates Stuffed With Chorizo Sausage- try it, you'll like it :)


A friend brought these to my house and they were a hit! So, I made them for some events over the holidays and EVERYONE wanted the recipe. (After I convinced them to try one, admittedly some people were weirded out about the whole meat and dried fruit combo.) Friends and family decided that this recipe should go onto the blog as they were getting gobbled up. So, I grabbed a few remaining dates and took a picture. (hence the fact that there are only three dates on a little plate in the shot!)

Get some nice large and soft pitted dried dates. Cut up cured (cooked and ready to eat) chorizo sausage into small enough pieces to stuff into the dried dates. (Chorizo sausage is available at most Italian deli's.) The dates have a natural place where they will open so the sausage can be stuffed in. Squeeze the date back together in your hand so the sausage is hidden inside. Cut a package of bacon in half. Wrap each date with 1/2 a piece of bacon and secure with a toothpick.

Bake covered at 400 degrees for 40 minutes, and then uncovered for 20 minutes to crisp up the bacon.

*note, I made up a whole bunch of these and froze them raw. Then, I had ready made appetizers to bring to holiday functions :) Just be sure to thaw them before baking.